How to Import and Customize n8n Templates (Beginner-Friendly)
Using n8n templates is the fastest way to build automation without starting from zero. In this short guide, you’ll learn how to import a template, connect your accounts, and customize it to fit your exact use case.
What is an n8n Template?
An n8n template is a ready-made workflow built with nodes (Trigger → Actions → Logic). You import it, update credentials, change a few settings, and your automation is ready.
Step 1: Get the Template (JSON File)
Most templates come as a .json workflow file.
Download the template JSON
Keep it saved on your computer (you’ll upload it into n8n)
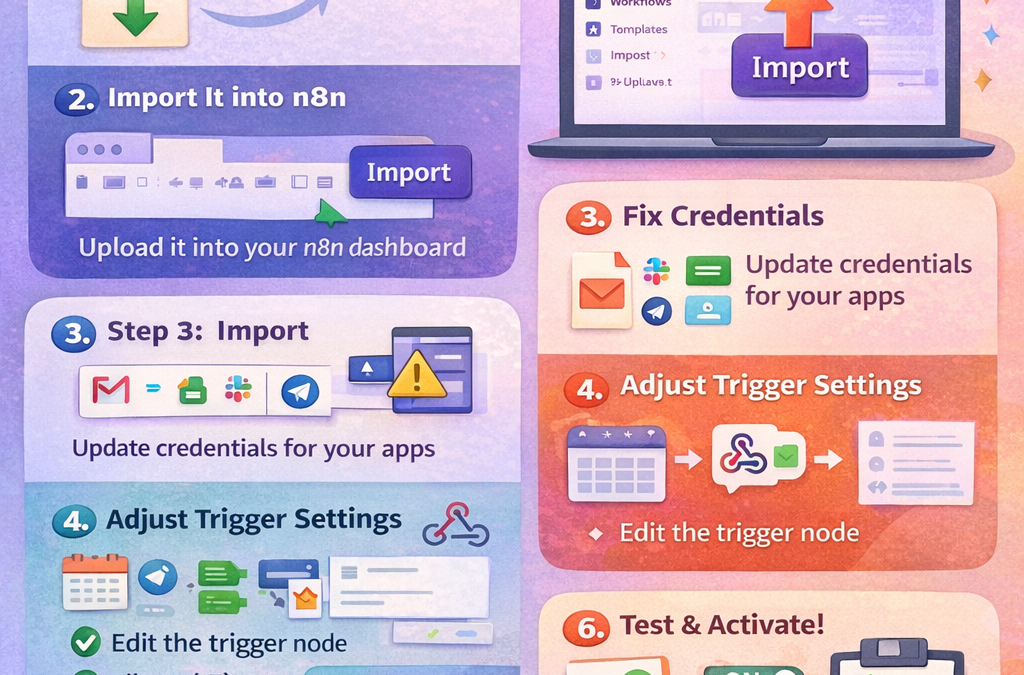
Step 2: Import the Template into n8n
Inside your n8n dashboard:
Go to Workflows
Click Import (or the menu icon → Import workflow)
Upload the .json file
The workflow will open on your canvas instantly

n8n work flow
✅ Now your template is inside n8n.
Step 3: Fix Credentials (Most Important Step)
Imported workflows usually show warnings like “Credentials missing”.
Click the node with error (example: Gmail, Google Sheets, Telegram, Slack)
In Credentials, select Create New
Connect your account (OAuth/API Key)
Save
Repeat for each node that requires credentials.
Step 4: Update the Trigger Settings
Templates often use triggers like:
Webhook
Schedule
New Email
New Row in Sheet
Check the trigger node settings:
For Webhook: copy the Production URL after activation
For Schedule: set your preferred time (every day/hour/week)
For App triggers: confirm correct folder, label, or spreadsheet
Step 5: Customize the Workflow Output (Your Real Use Case)
Now edit the template to match your goal:
Common Customizations
Change message text (email/telegram/slack)
Change spreadsheet name or sheet tab
Update filters (IF node conditions)
Add your branding (company name, website, signature)
Change what data is sent (map fields from previous nodes)
Tip: Use the Set node to rename/format fields cleanly before sending them to the next step.
Step 6: Test Before Activating
Click Execute Workflow
Run the trigger (send webhook / wait for event / manual test)
Open each node output to confirm data is correct
Fix errors and re-test
✅ If execution shows “success,” you’re ready.
Step 7: Activate the Workflow
When everything is working:
Click Save
Toggle Active
Now the template runs automatically in the background.
Quick Tip: Make Templates Your Own
Once you customize a workflow, save it as your own template:
Duplicate the workflow
Rename it (Example: “Lead Capture → Google Sheets + Email”)
Keep one clean version as a reusable copy